RedRocket
TY 4 Stroke Junkie
First off, thanks to all the help on this site and the great pictures from the users that have done this. The most useful thread was this one by otis which inspired me to do this. I figured this would be long enough to start a new thread rather then continue that one.
Click any thumbnails for larger images.
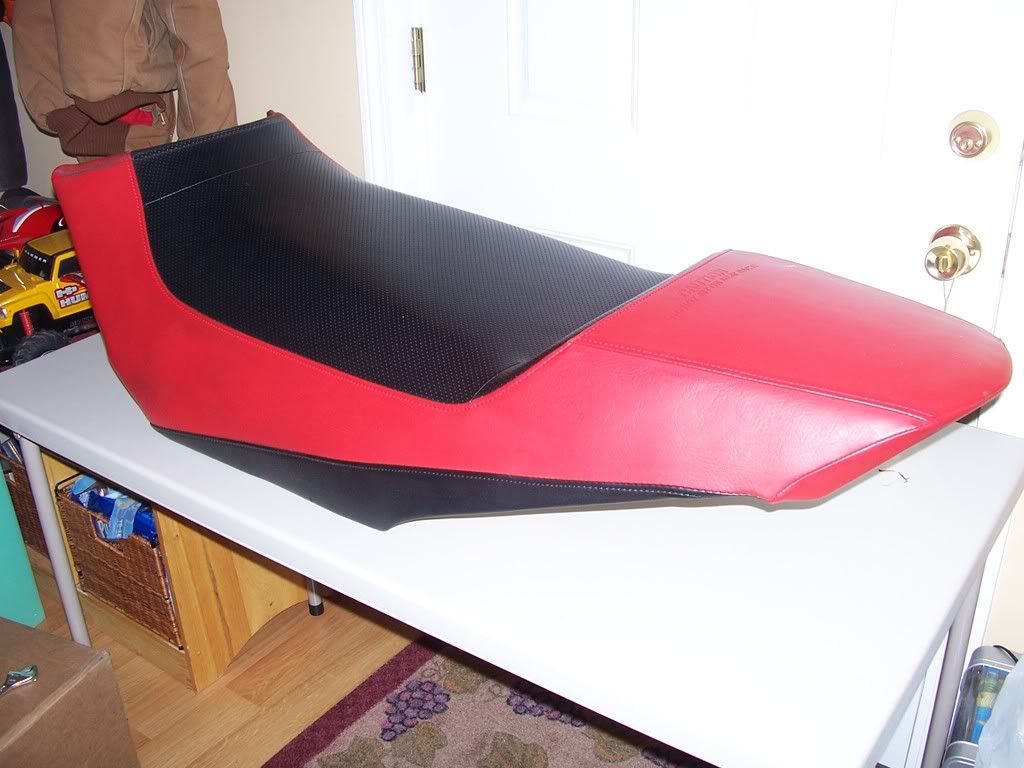
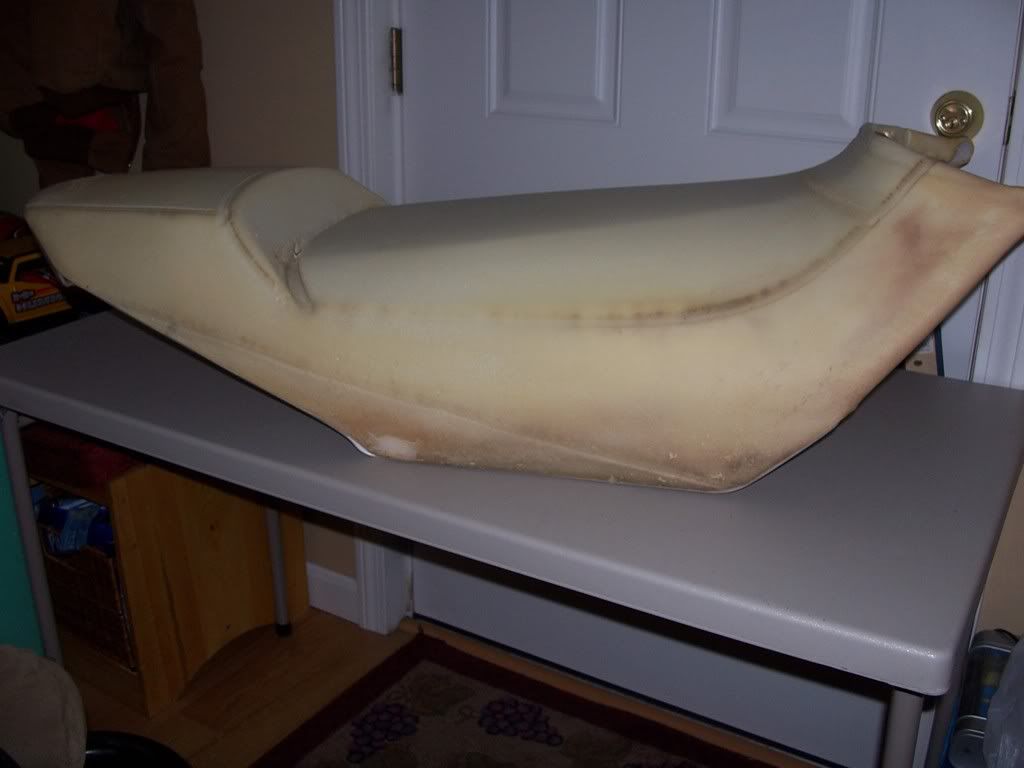
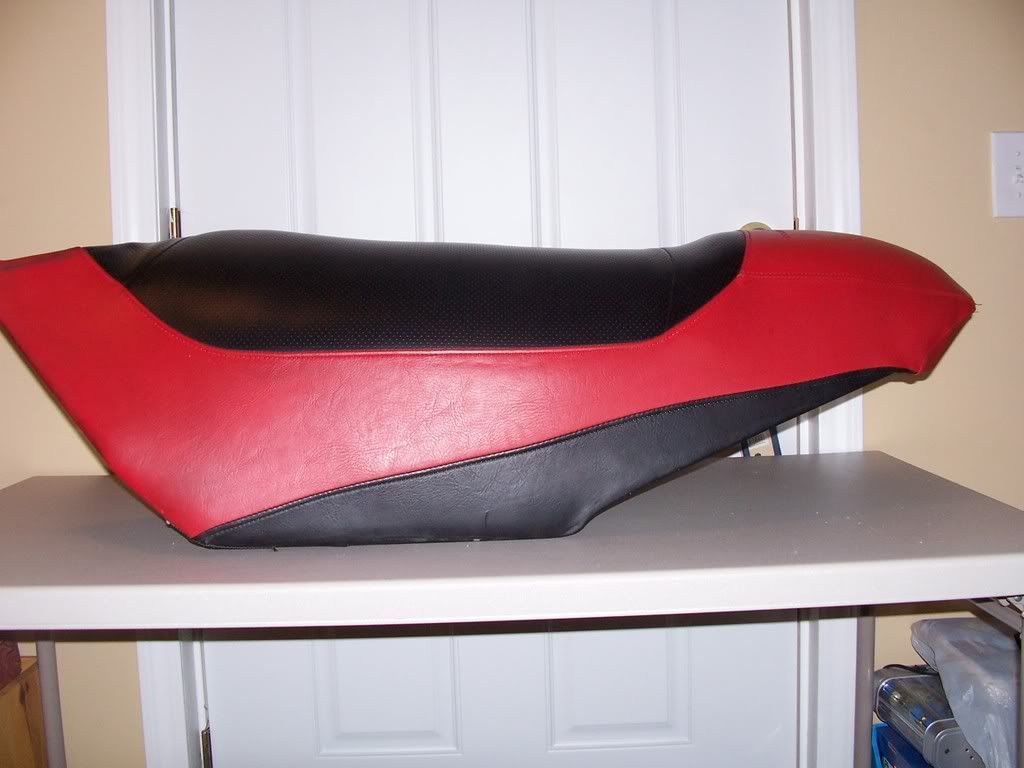
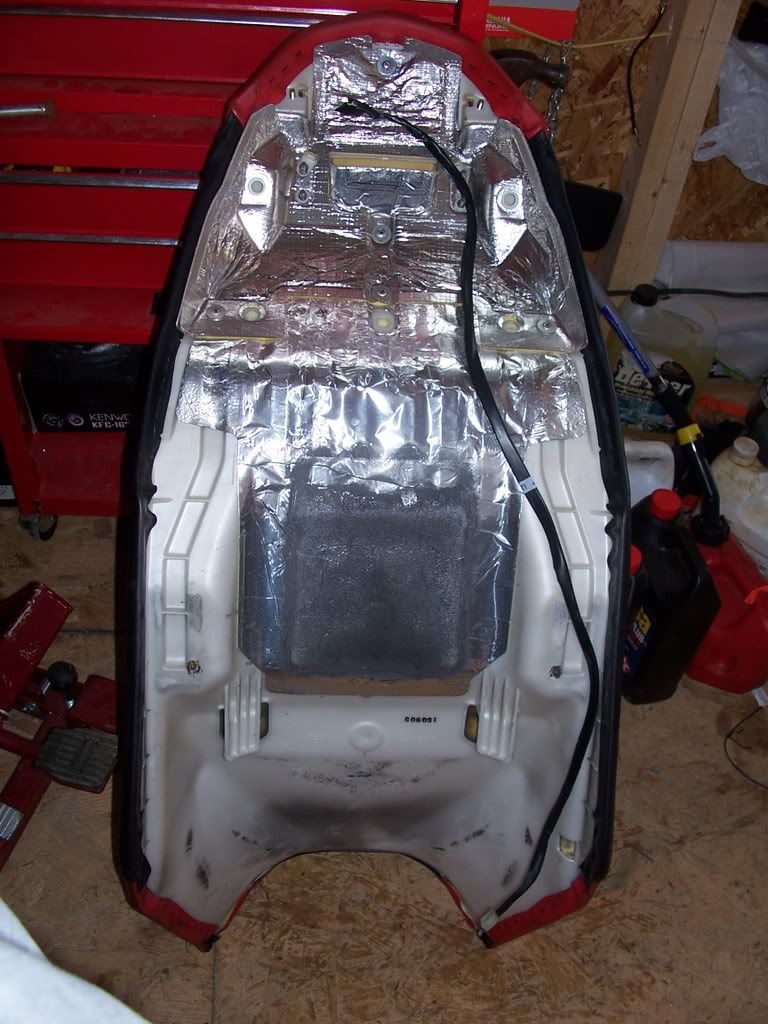
First some pictures of my seat that I got off of ebay so that I wouldn't have to ruin my original seat.


Pulling off the cover wasn't nearly as bad as I thought it would be, I used a small screwdriver to get under the staple and pull it up a little and then went around with a pair of pliers pulling them all out. They come out very easy.


Notice how many staples there are on the table, there's a ton!
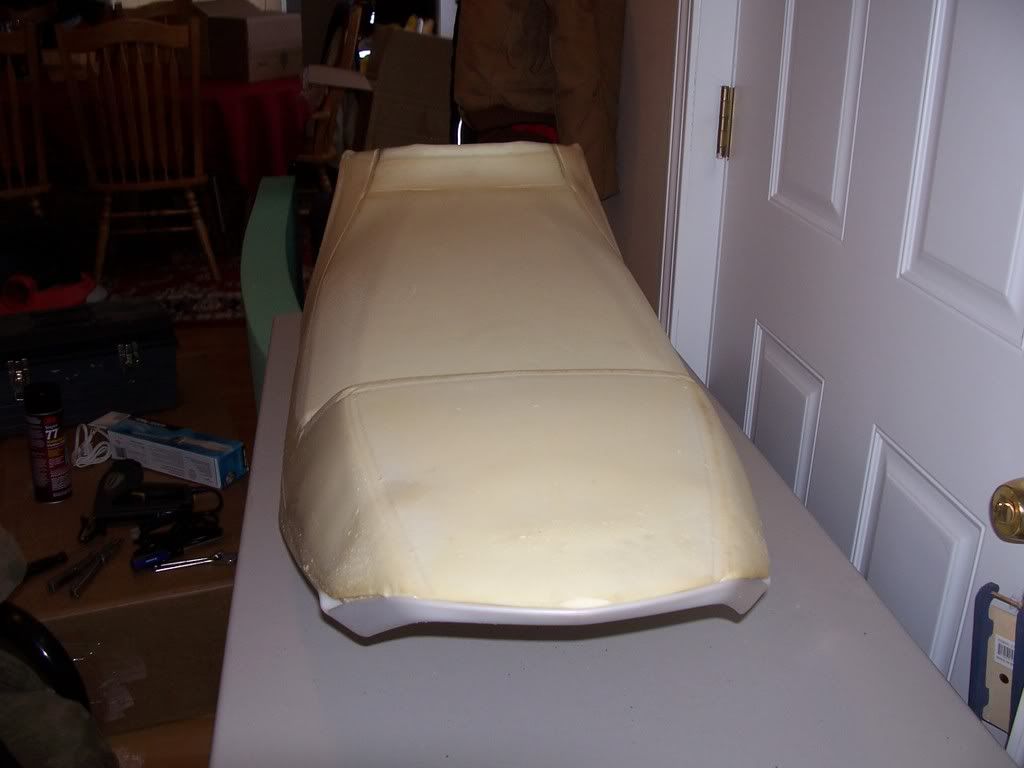
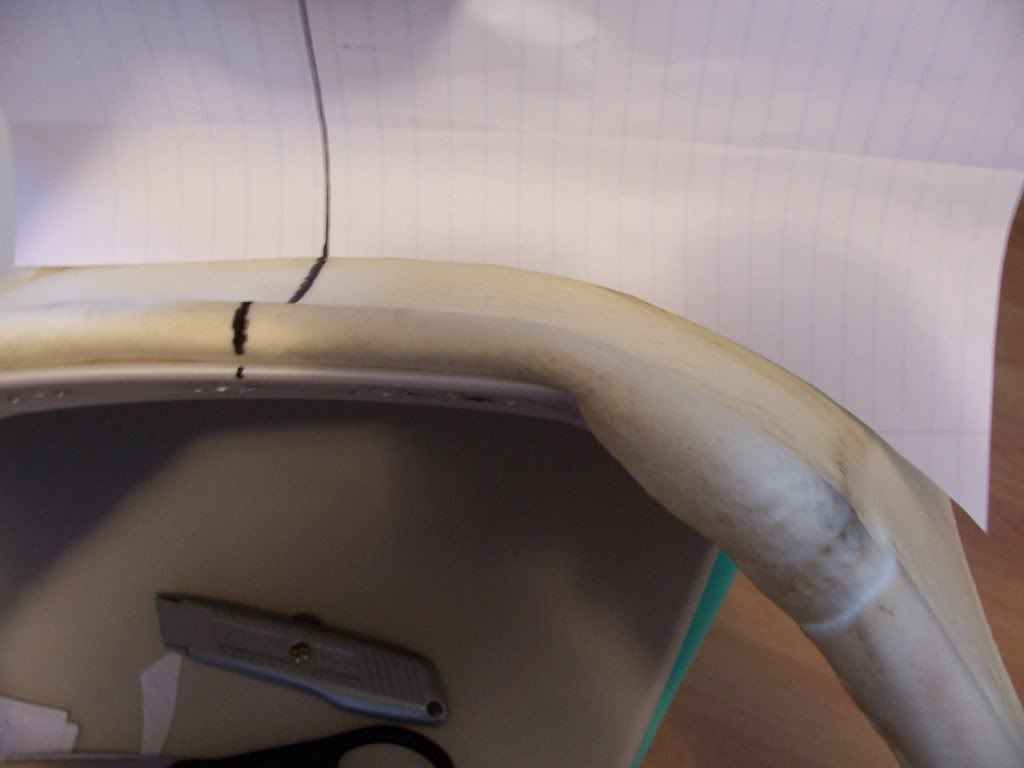
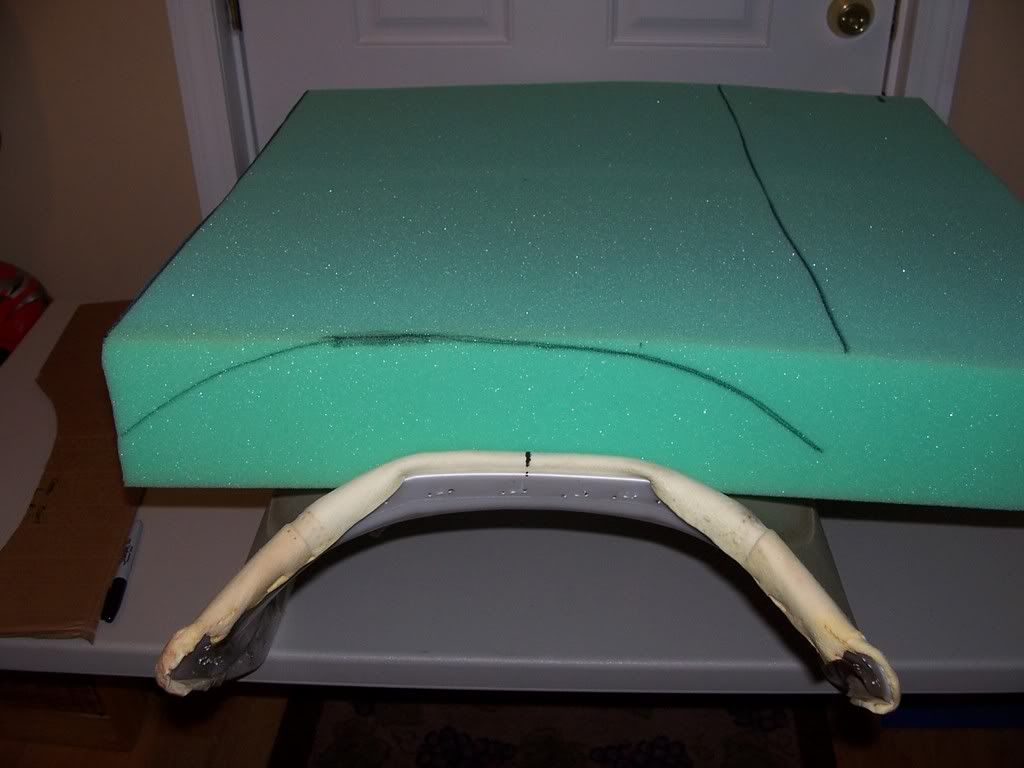
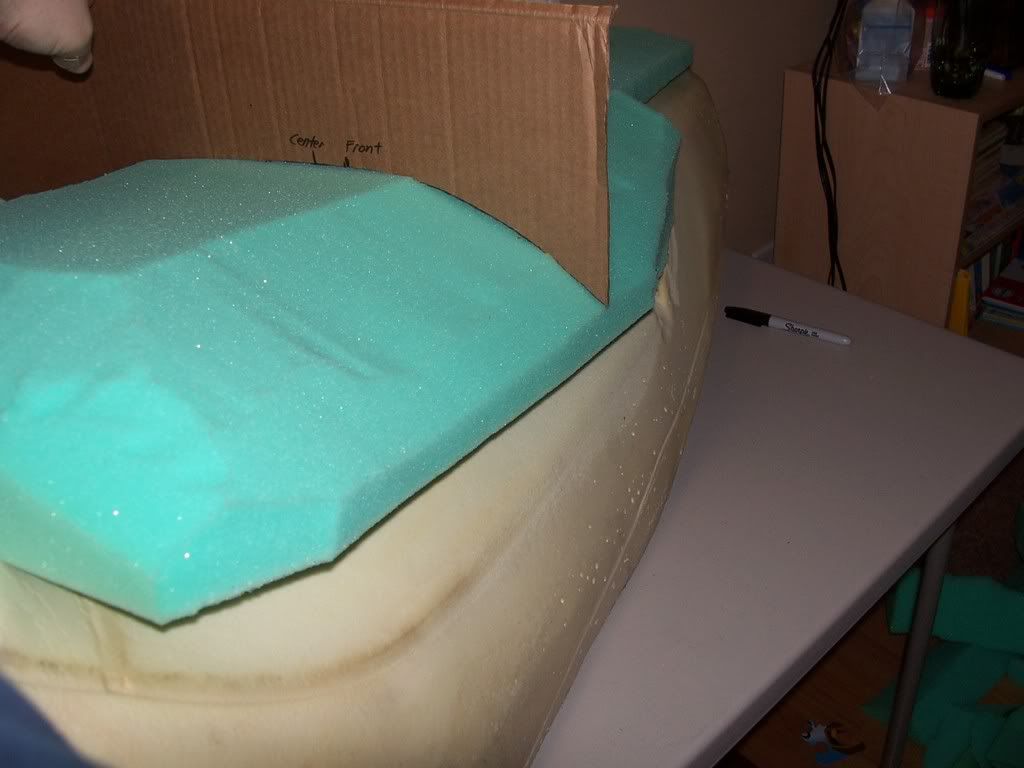
I wanted to keep the same profile of the original seat so I made a template from paper until I got the right curve and then transferred that to a piece of cardboard to use on the foam. Finding the center of the seat and then marking that on the paper, I could lay it out on the cardboard and then flip it over and make it a complete half circle.


I took my template and marked it on the end of my 4" high density piece of foam and then started the rough trimming. I left the front area flat so it could still slide under the tank cowl without any trimming and for the rear flat area I ripped a piece to be about one inch higher then the foam on the seat. This way it still sits up higher then the seat area like the original did. At first I was going to leave it the same height as the seat but I would lose the lip and the cover would be wrinkled in that area. In the picture, the rear piece is flush with the seat foam, this was causing the wrinkling so I made the higher piece but didn't take a picture.


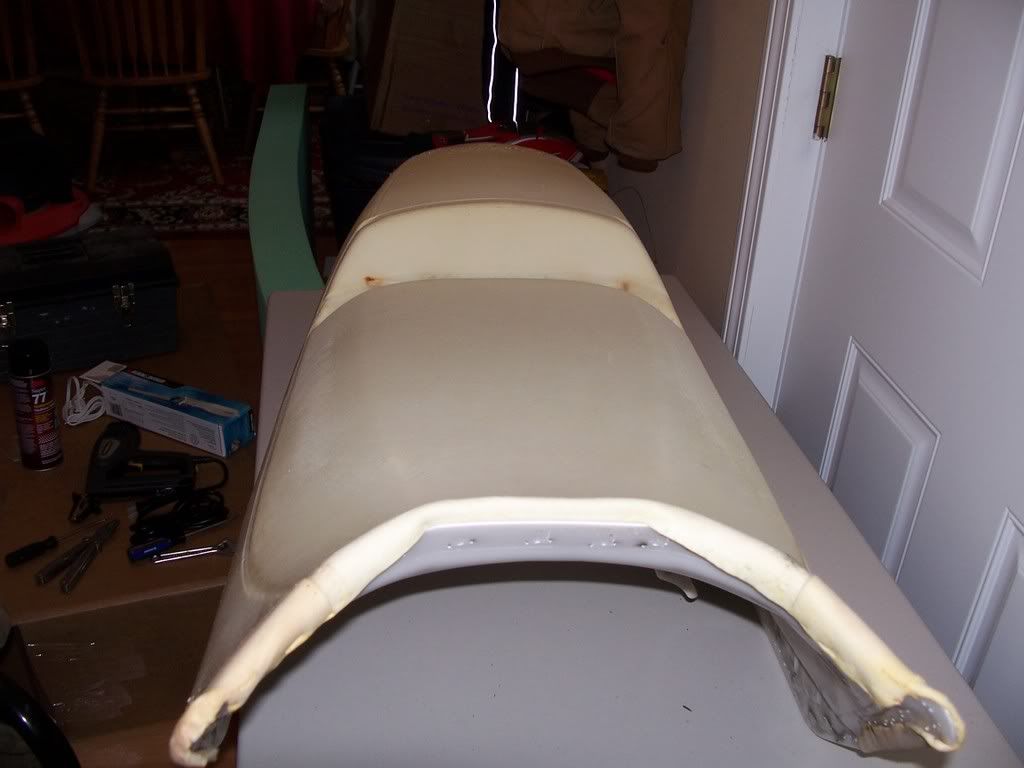
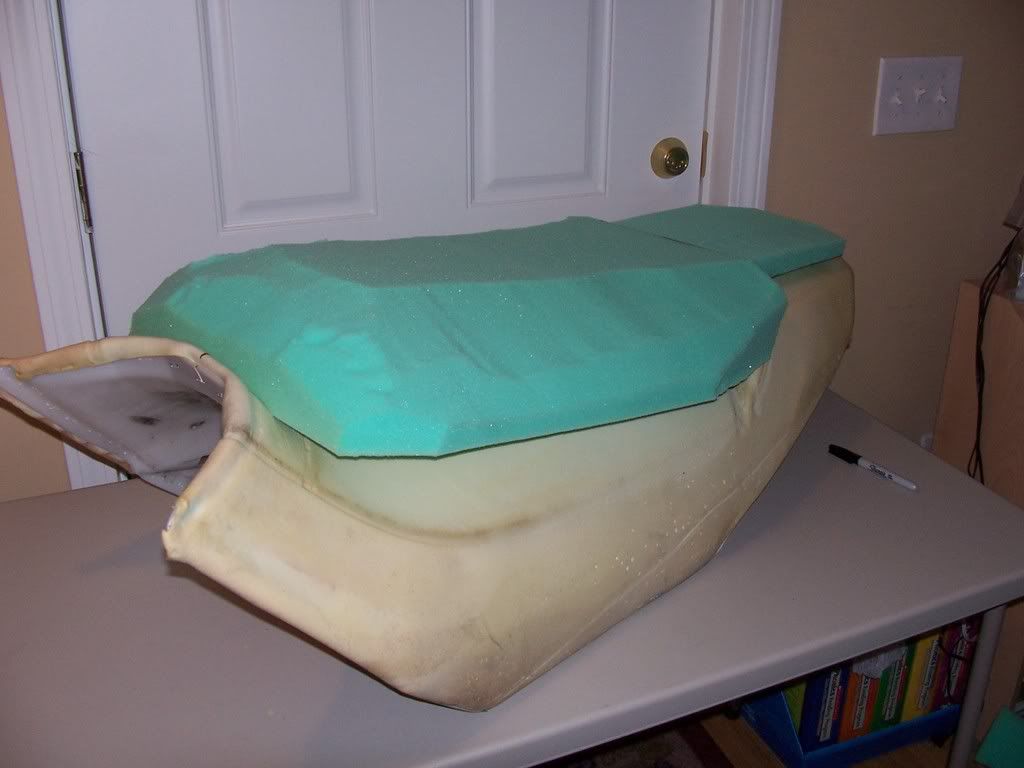
Using the template, I kept trimming the sides until the curve was as close as I could get it.

There was a ton of more trimming and smoothing but didn't take a picture since I was so excited about getting the cover on.
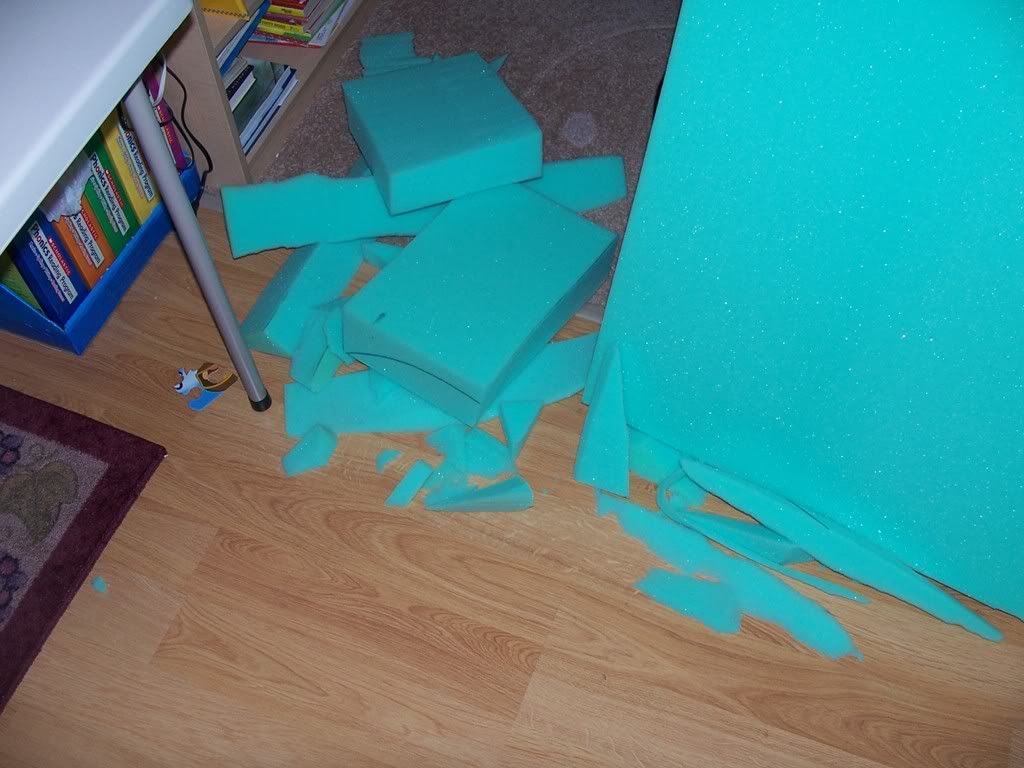
Be prepared for a big ole pile of foam pieces.

The tough part was getting the cover back on. I started by putting the rear lip on and then the front corner lips. This is nice, because it keeps the cover on and in place before you start stapling. I bought an electric stapler and glad I did, I can't imagine trying to use my powershot hand stapler to do this.
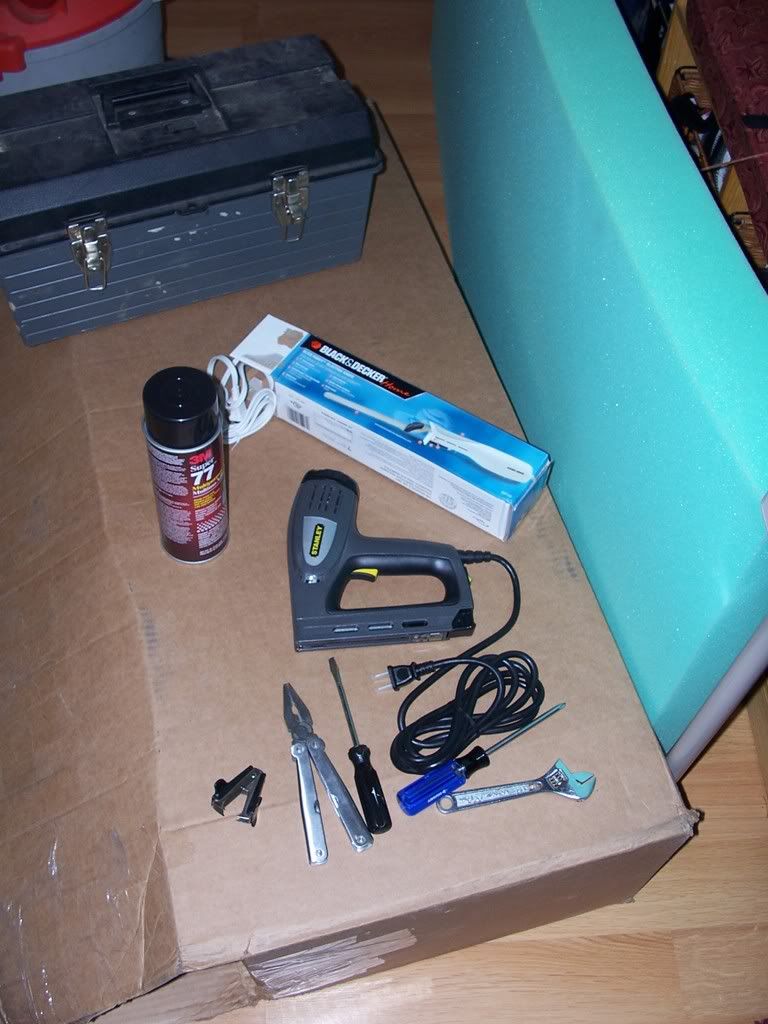
Here's the tools for putting this together:

Once you start stretching it, you can get the edge back to the original staple area and in some cases, even pull it in more. It is much easier with a second hand to help stretch and hold it while you staple too!
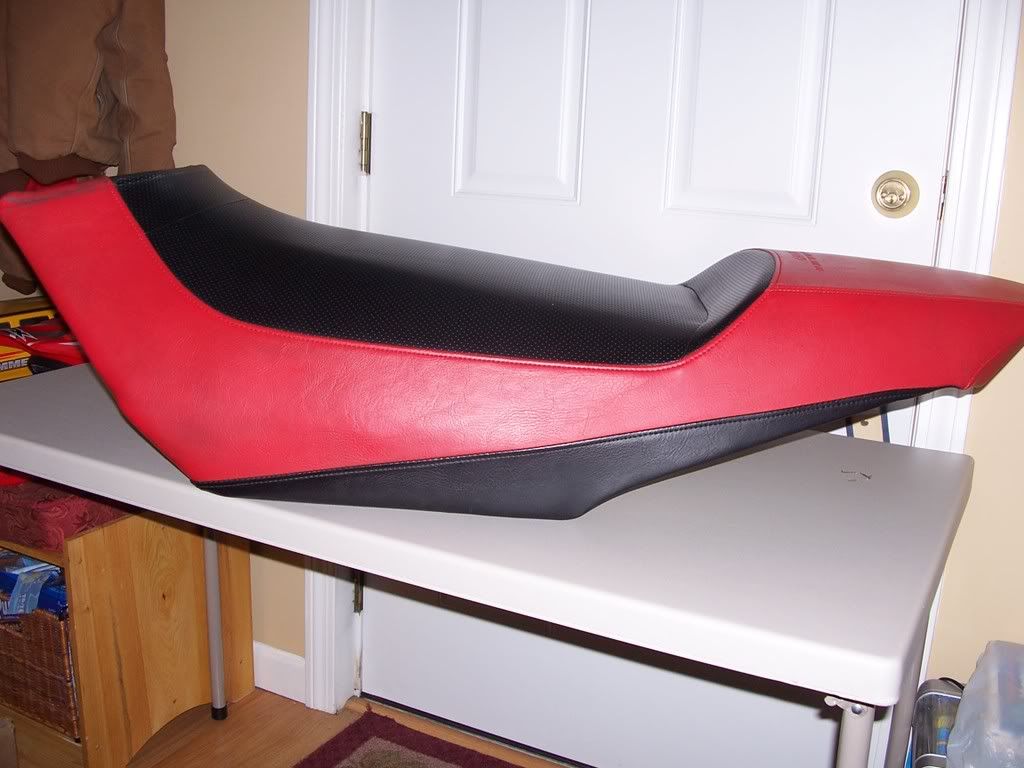
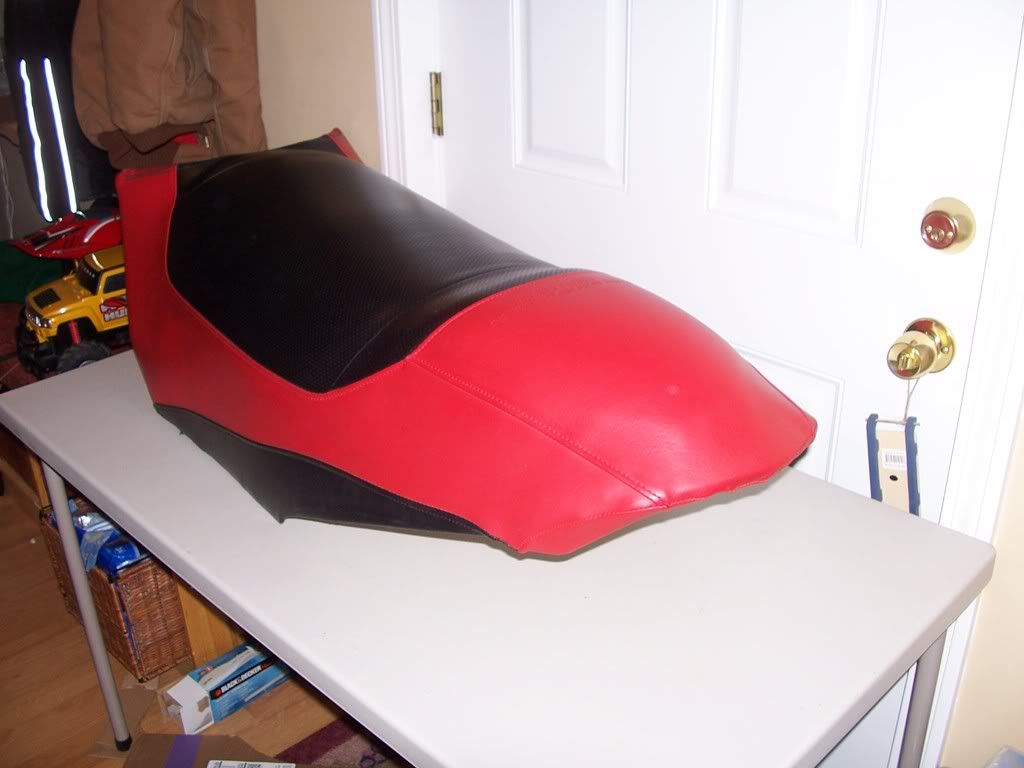
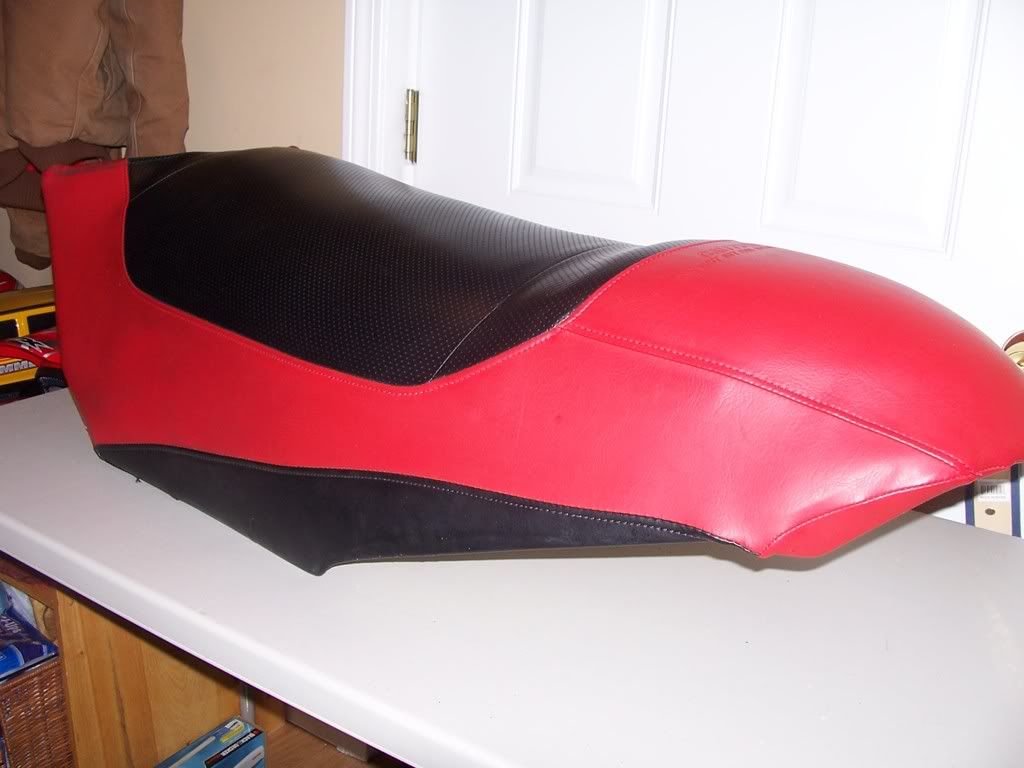
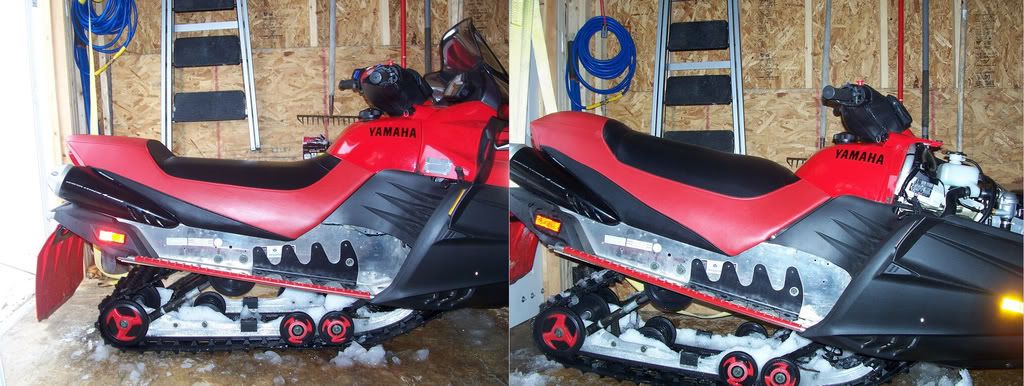
Here are some pictures of the finished result:


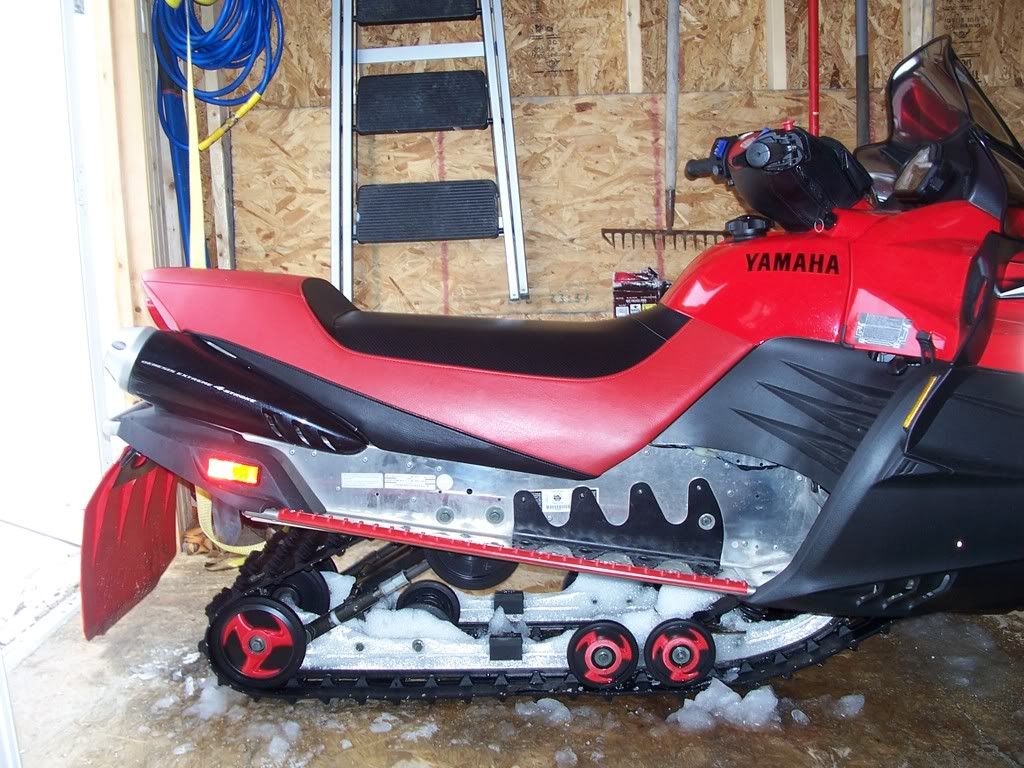
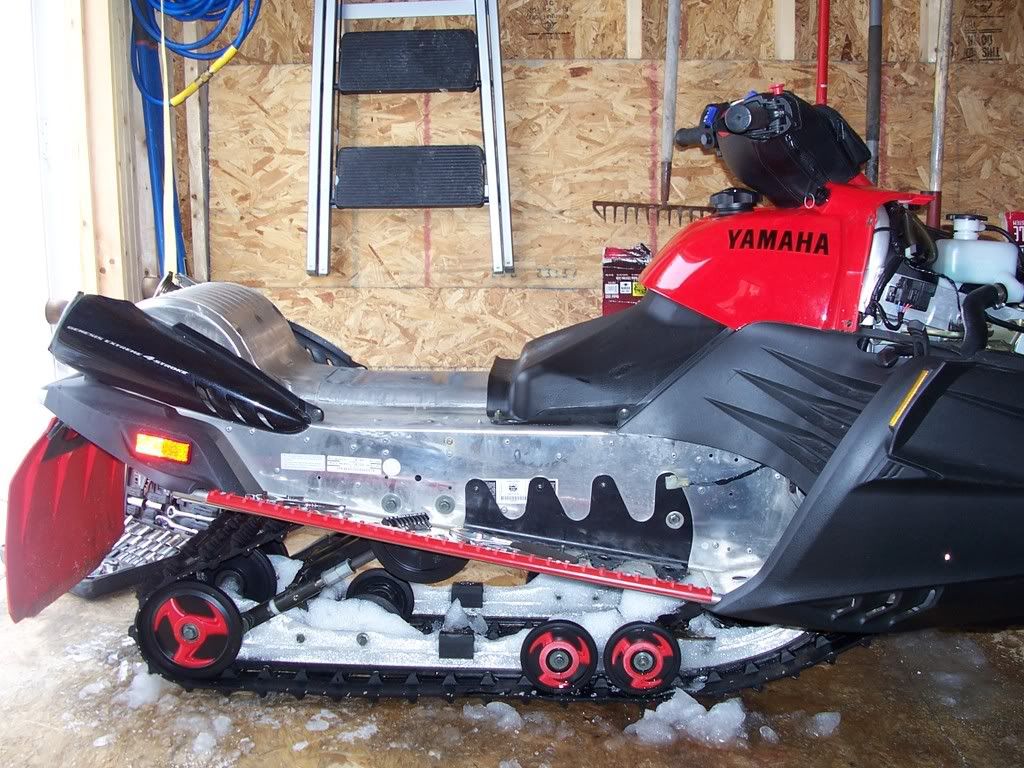
A picture of the original seat on the sled and with the seat off::


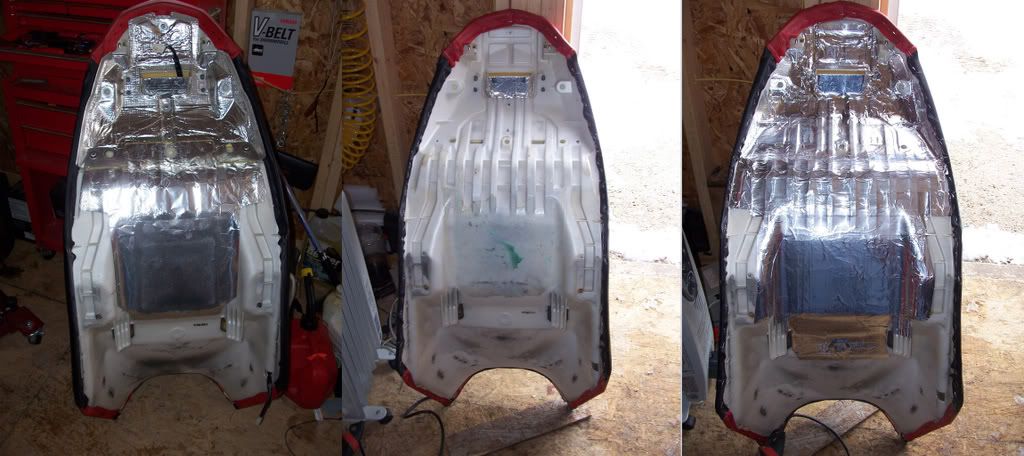
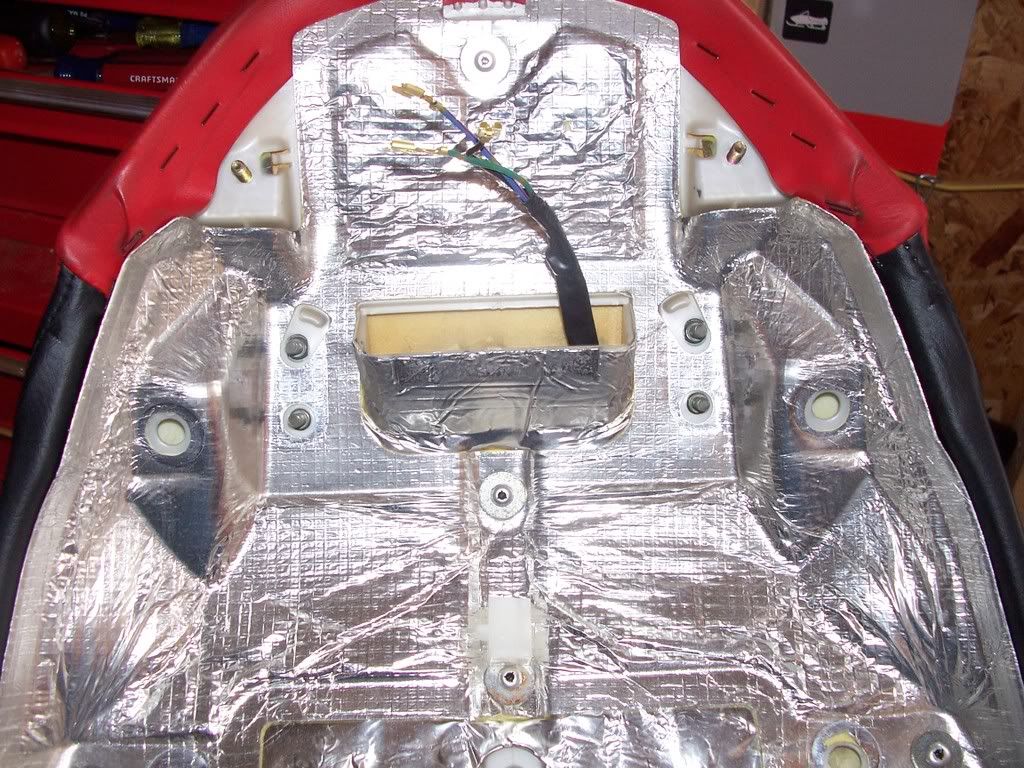
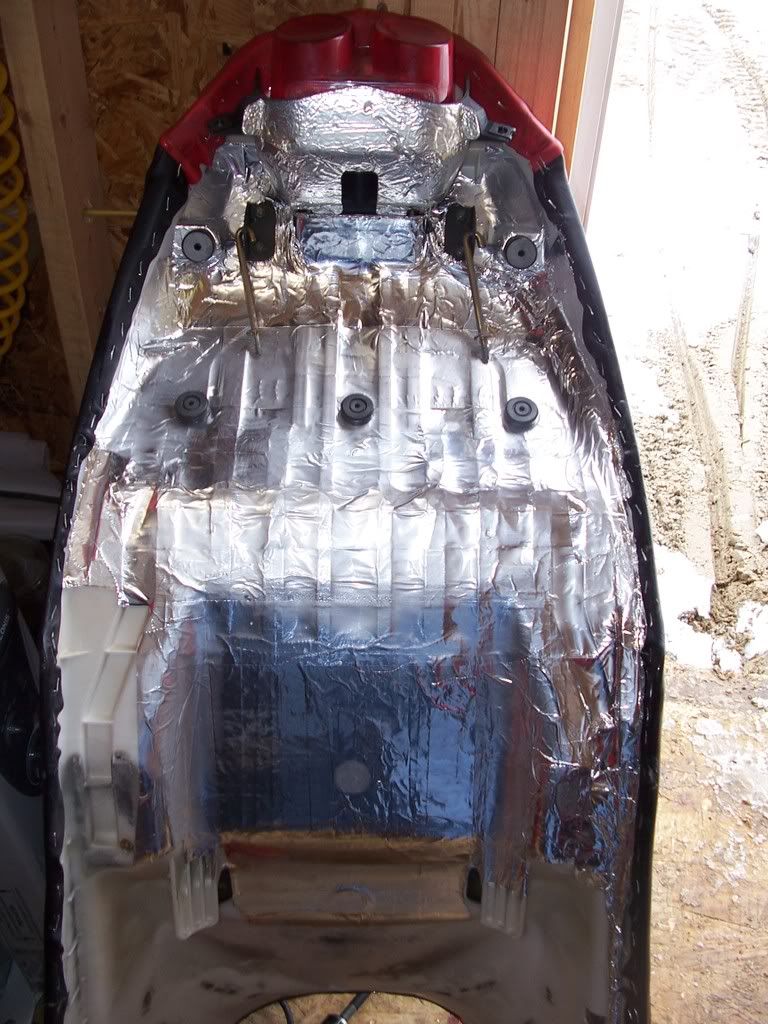
Once I got the seat off, I noticed there were quite a few things missing on the one I bought. The most important part being the heat resistant tape. I don't want the plastic seat frame to melt to the exhaust shields, so I got some heat resistant aluminum foil tape and taped off the areas that were covered on the original.
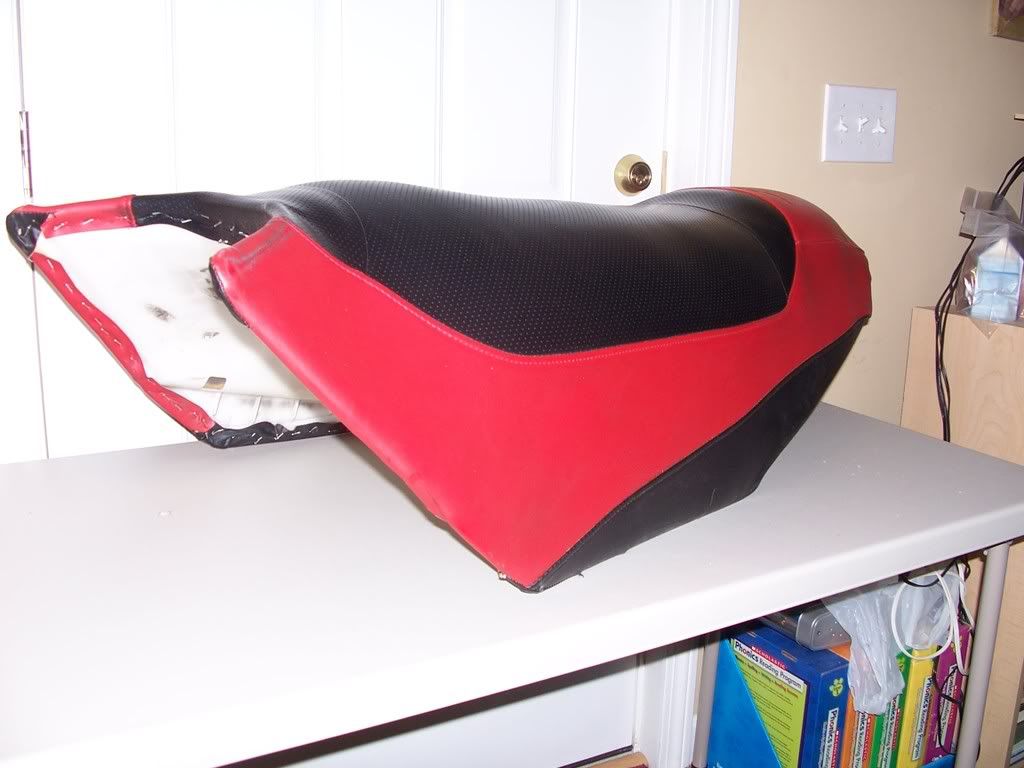
Here is a before and after with the original on the far left side:

I was also missing the brake light cable and rubber stops. The cable was taped in place between the frame and the padding so I took the connector off the rear half and pulled the cables through. It was easier than I thought it would be.


There was no way I was going to be able to feed the cable between the frame and padding on the new seat so I covered it in aluminum foil tape and ran it along the edge. There was a bevel all along the edge that the cable fit perfectly in and I taped it down in place.
You can kind of see it on the right hand side:

Now that it is all said in done, I would do it all over again in a heartbeat. The difference is absolutely amazing, it feels like a new sled. I sit up much higher than normal and my knees are finally at the same height as my hips so it does not feel like I am falling back while riding.
If you like your sled but hate the stock seat, this is the best thing you could possibly do to it. I wouldn't trade this sled for any new one.

Here is a little side-by-side comparison of the seats:

And one with me sitting on it:

My back, arms and legs straighter and you feel more in control of the sled.
I bought about twice as much foam as I needed but I wanted to be safe rather than sorry. The foam is 4" of high density 3ft wide by 5ft long and was $66 from Jo-Ann fabrics. I got the 3M spray adhesive ($10), electric knife ($10) and new staple gun ($25) from Wal-mart. From uncovering the seat to installing the new one, I have about 5hrs into the project but if I didn't have to take so much time putting all the stuff from the original seat to the new one, it would have taken 4hrs at the max.
I wish I had did this at the beginning of the season since it is pretty much done around here, but I will put as many miles on in the next 2 weeks as I can. I already can't wait until next year.
Click any thumbnails for larger images.
First some pictures of my seat that I got off of ebay so that I wouldn't have to ruin my original seat.
Pulling off the cover wasn't nearly as bad as I thought it would be, I used a small screwdriver to get under the staple and pull it up a little and then went around with a pair of pliers pulling them all out. They come out very easy.
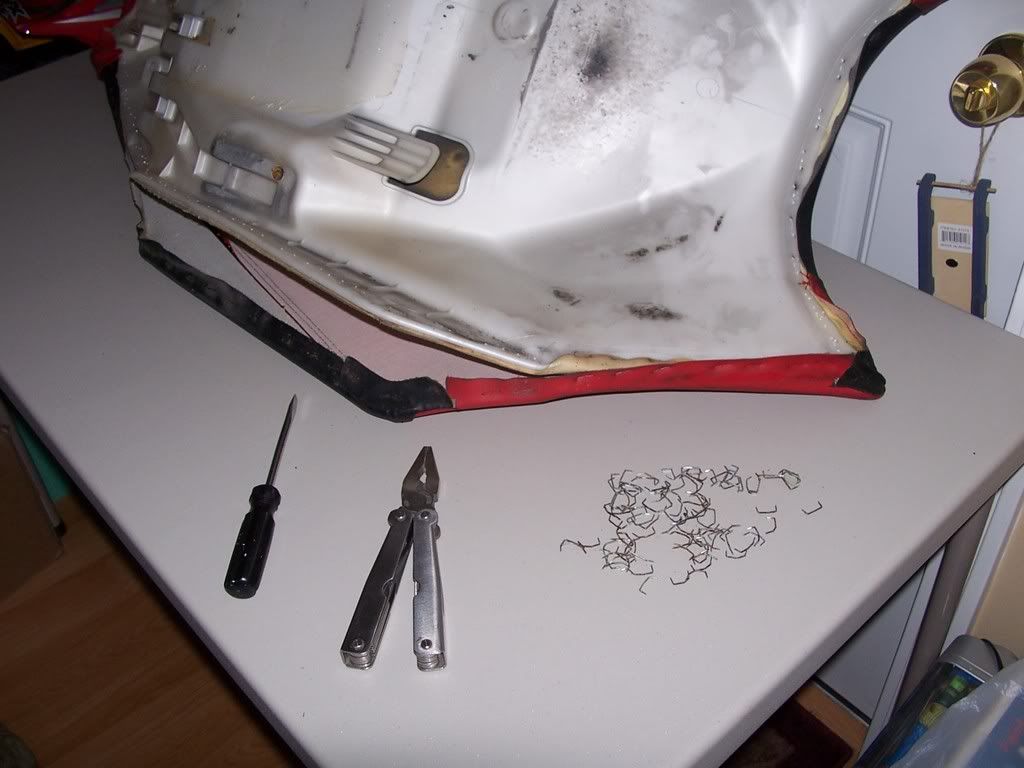
Notice how many staples there are on the table, there's a ton!
I wanted to keep the same profile of the original seat so I made a template from paper until I got the right curve and then transferred that to a piece of cardboard to use on the foam. Finding the center of the seat and then marking that on the paper, I could lay it out on the cardboard and then flip it over and make it a complete half circle.
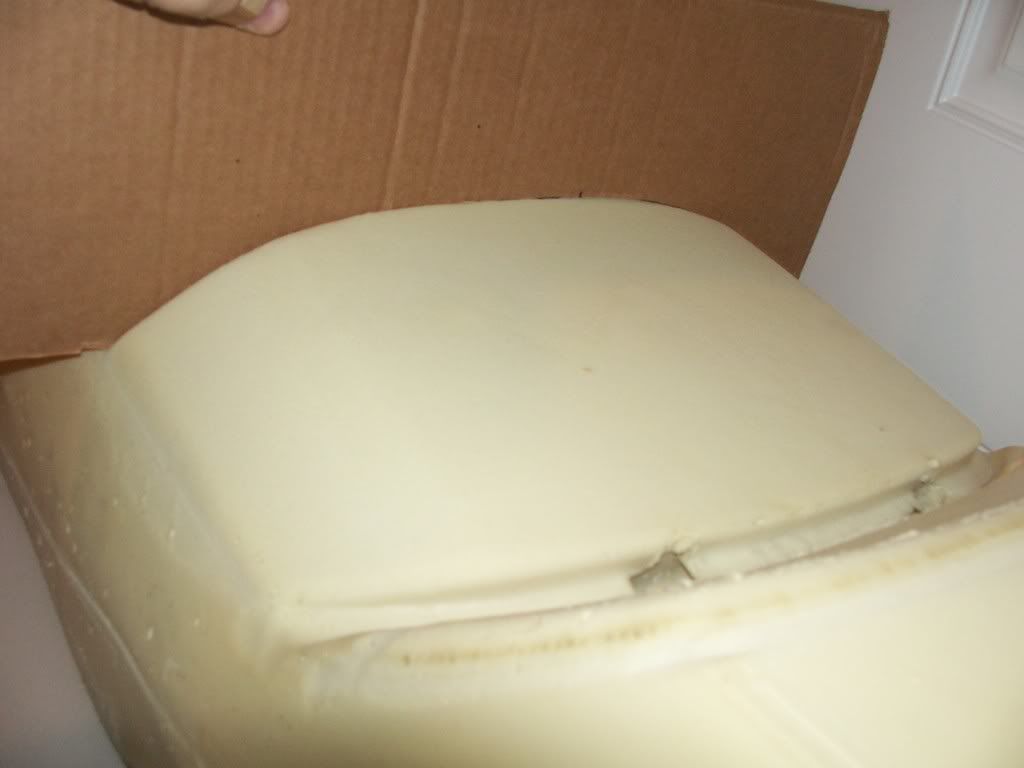

I took my template and marked it on the end of my 4" high density piece of foam and then started the rough trimming. I left the front area flat so it could still slide under the tank cowl without any trimming and for the rear flat area I ripped a piece to be about one inch higher then the foam on the seat. This way it still sits up higher then the seat area like the original did. At first I was going to leave it the same height as the seat but I would lose the lip and the cover would be wrinkled in that area. In the picture, the rear piece is flush with the seat foam, this was causing the wrinkling so I made the higher piece but didn't take a picture.
Using the template, I kept trimming the sides until the curve was as close as I could get it.
There was a ton of more trimming and smoothing but didn't take a picture since I was so excited about getting the cover on.
Be prepared for a big ole pile of foam pieces.
The tough part was getting the cover back on. I started by putting the rear lip on and then the front corner lips. This is nice, because it keeps the cover on and in place before you start stapling. I bought an electric stapler and glad I did, I can't imagine trying to use my powershot hand stapler to do this.
Here's the tools for putting this together:
Once you start stretching it, you can get the edge back to the original staple area and in some cases, even pull it in more. It is much easier with a second hand to help stretch and hold it while you staple too!
Here are some pictures of the finished result:
A picture of the original seat on the sled and with the seat off::
Once I got the seat off, I noticed there were quite a few things missing on the one I bought. The most important part being the heat resistant tape. I don't want the plastic seat frame to melt to the exhaust shields, so I got some heat resistant aluminum foil tape and taped off the areas that were covered on the original.
Here is a before and after with the original on the far left side:
I was also missing the brake light cable and rubber stops. The cable was taped in place between the frame and the padding so I took the connector off the rear half and pulled the cables through. It was easier than I thought it would be.
There was no way I was going to be able to feed the cable between the frame and padding on the new seat so I covered it in aluminum foil tape and ran it along the edge. There was a bevel all along the edge that the cable fit perfectly in and I taped it down in place.
You can kind of see it on the right hand side:
Now that it is all said in done, I would do it all over again in a heartbeat. The difference is absolutely amazing, it feels like a new sled. I sit up much higher than normal and my knees are finally at the same height as my hips so it does not feel like I am falling back while riding.
If you like your sled but hate the stock seat, this is the best thing you could possibly do to it. I wouldn't trade this sled for any new one.
Here is a little side-by-side comparison of the seats:
And one with me sitting on it:
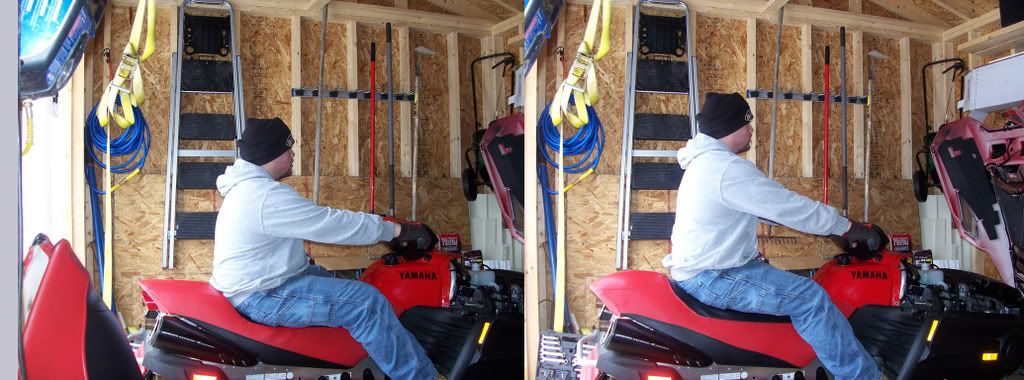
My back, arms and legs straighter and you feel more in control of the sled.
I bought about twice as much foam as I needed but I wanted to be safe rather than sorry. The foam is 4" of high density 3ft wide by 5ft long and was $66 from Jo-Ann fabrics. I got the 3M spray adhesive ($10), electric knife ($10) and new staple gun ($25) from Wal-mart. From uncovering the seat to installing the new one, I have about 5hrs into the project but if I didn't have to take so much time putting all the stuff from the original seat to the new one, it would have taken 4hrs at the max.
I wish I had did this at the beginning of the season since it is pretty much done around here, but I will put as many miles on in the next 2 weeks as I can. I already can't wait until next year.
Are you using the stock seat cover?
RedRocket
TY 4 Stroke Junkie
Sorry, haven't been on in quite a while. Yes, I did use the stock cover. There is plenty of extra material stapled under the seat to expand over the extra foam and still leave plenty of space to re-staple it.pugdaddy said:Are you using the stock seat cover?
Similar threads
- Replies
- 1
- Views
- 780